

Connect Shopify
To connect your Shopify store data to Enhencer you have to use Google Tag
Manager (GTM). If you do not have GTM installed, then follow the
instructions
here. Note that you have to be using Shopify Plus for this integration.
Login to Enhencer with your Shopify account, go to
Connect -> Shopify from navbar.
Including Enhencer script
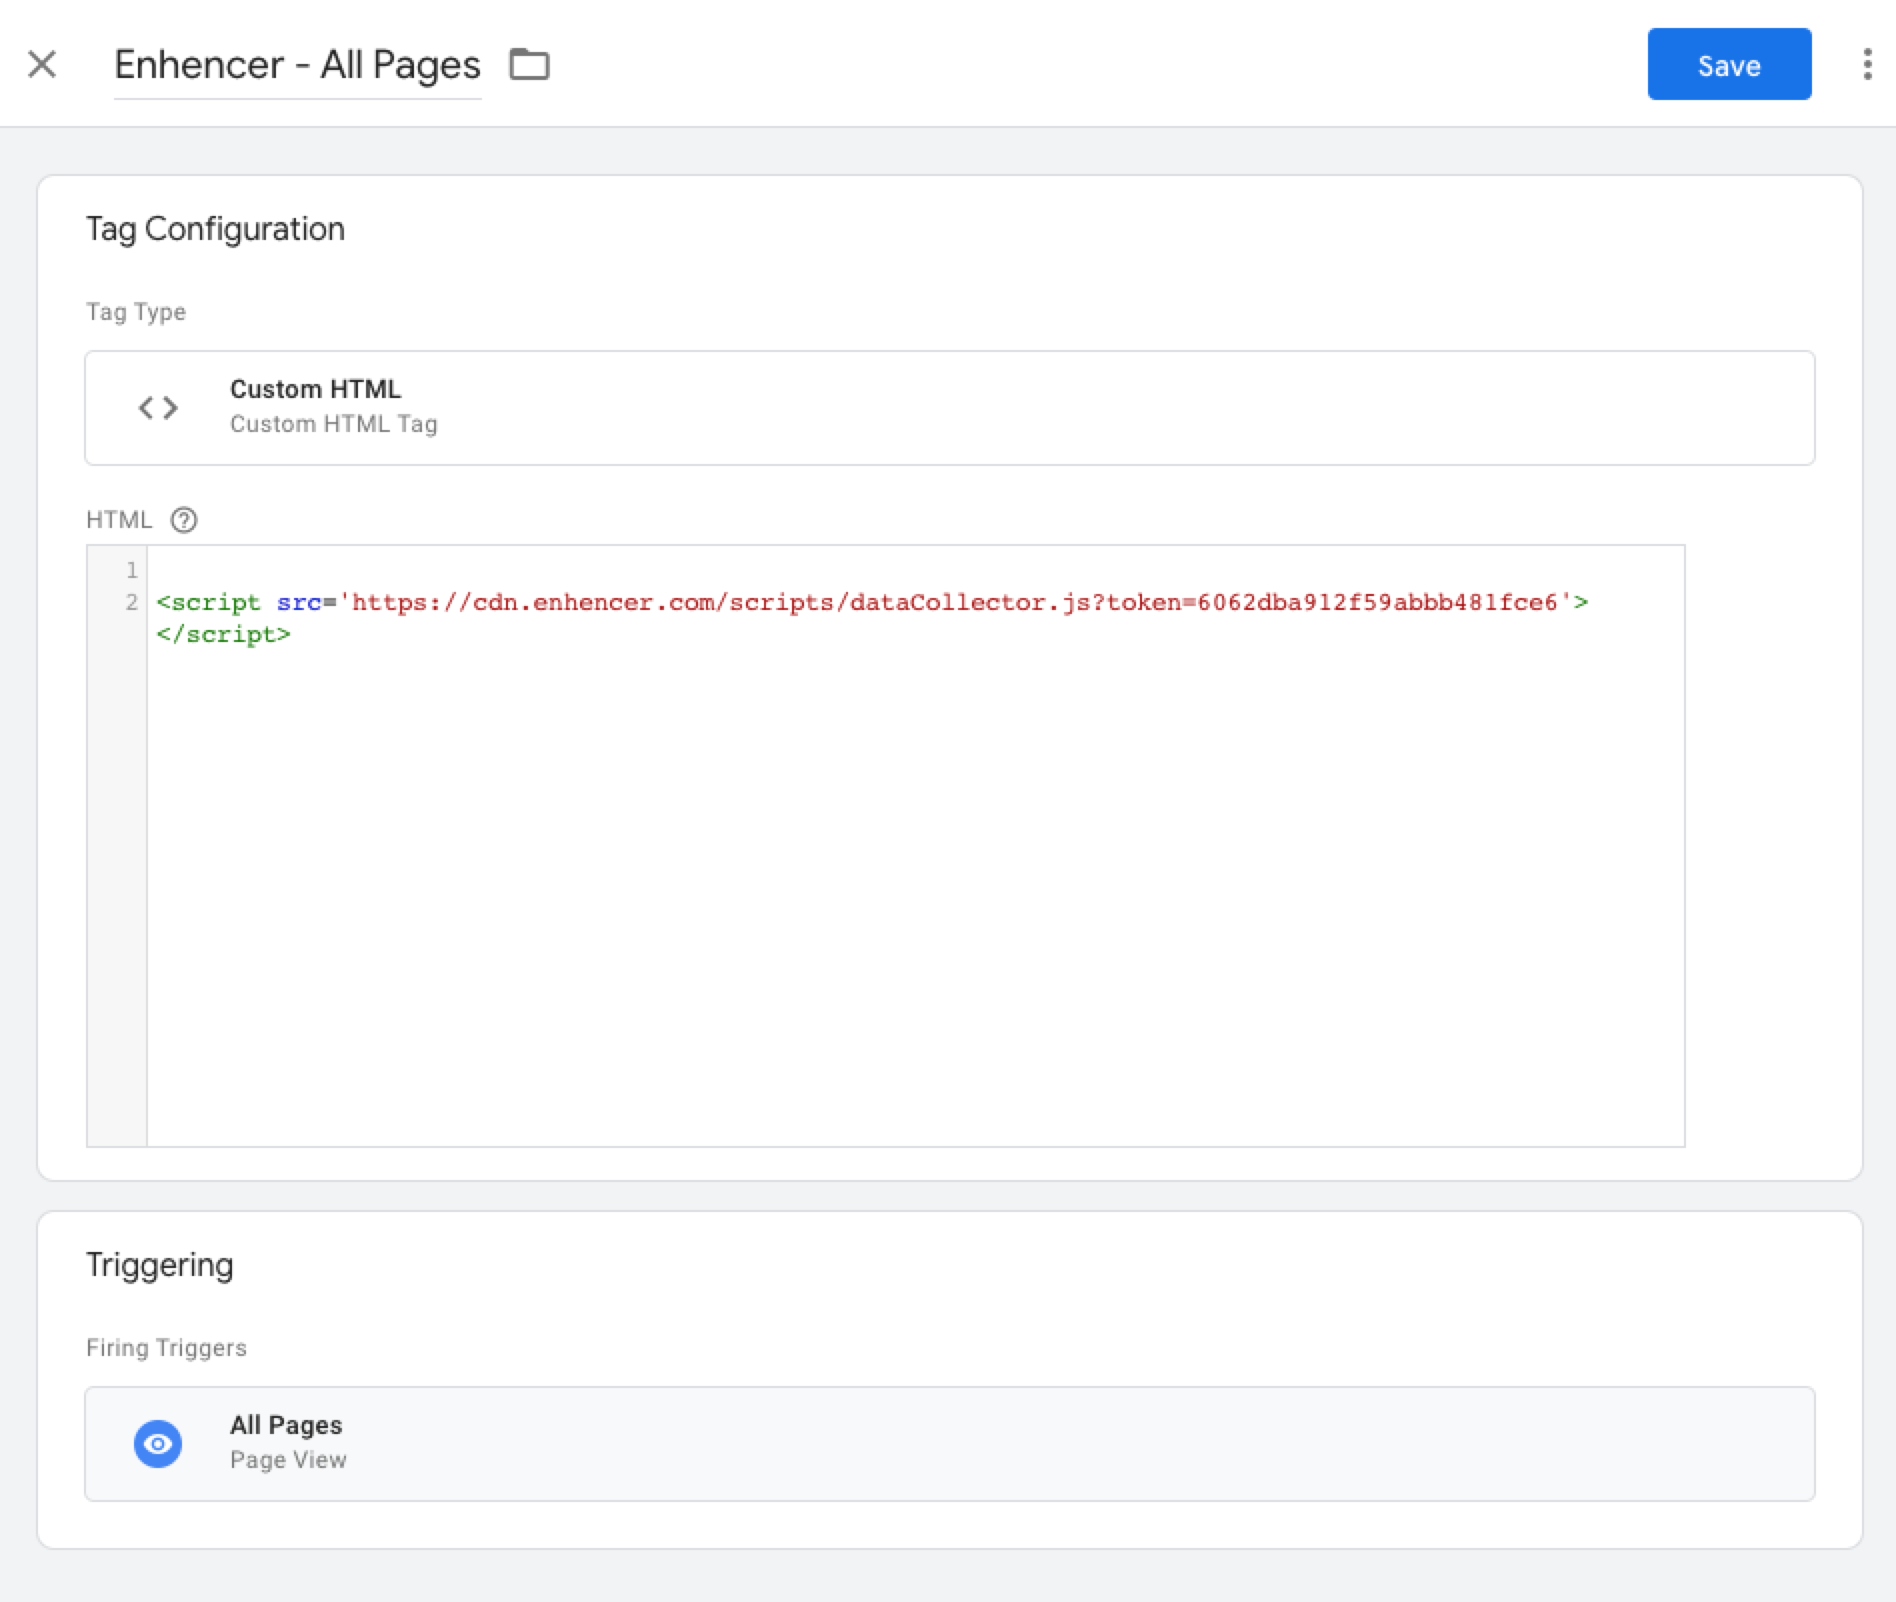
To start, create a new tag in Google Tag Manager called "Enhencer - All Pages". The type of the tag has to be 'Custom HTML'. Then copy the code below and paste it in the HTML field of the tag. The trigger for this tag has to the Pageview event of all pages.
<script src='https://cdn.enhencer.com/scripts/shopifyCollector.js?token=foo'></script>
Add to cart tag
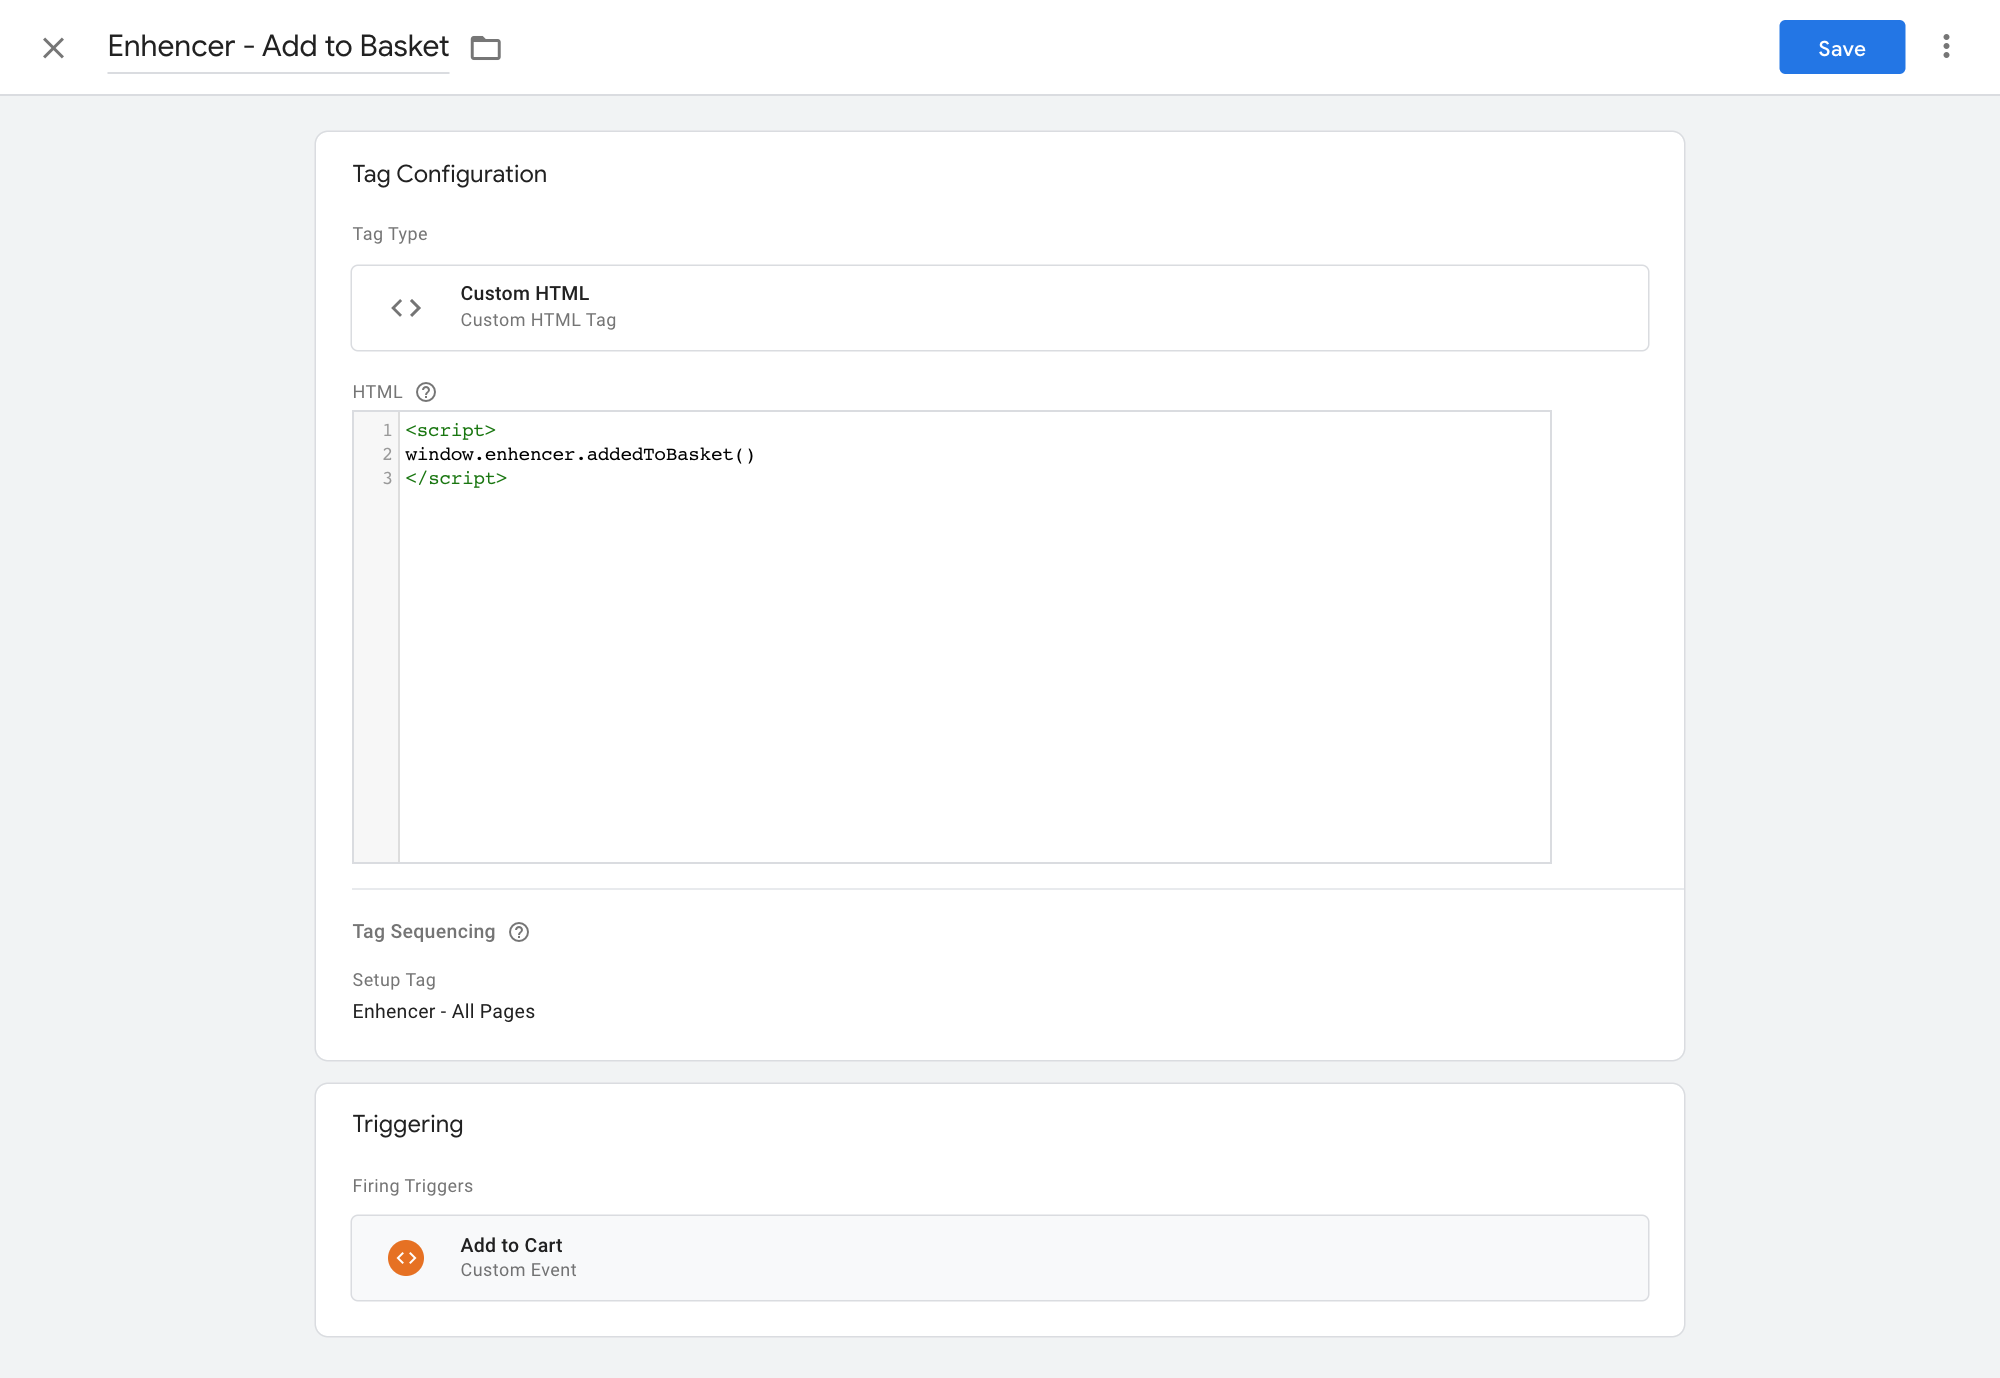
You have to configure one more tag for "Add to cart" event. Add a new tag
called "Enhencer - Add to Basket" and set the type to "Custom HTML". Copy
the code snippet to the HTML field. Replace the
productID parameter the ID of the product that has been added
to the cart. Set the trigger to 'add to cart/basket' event or button
click.
<script>
  window.enhencer.addedToBasket()
</script>
Google Ads event
After completing the configurations above, the events will appear
automatically on Facebook Ads panel.
But, for Google Ads, you have to do one last tag configuration on GTM.
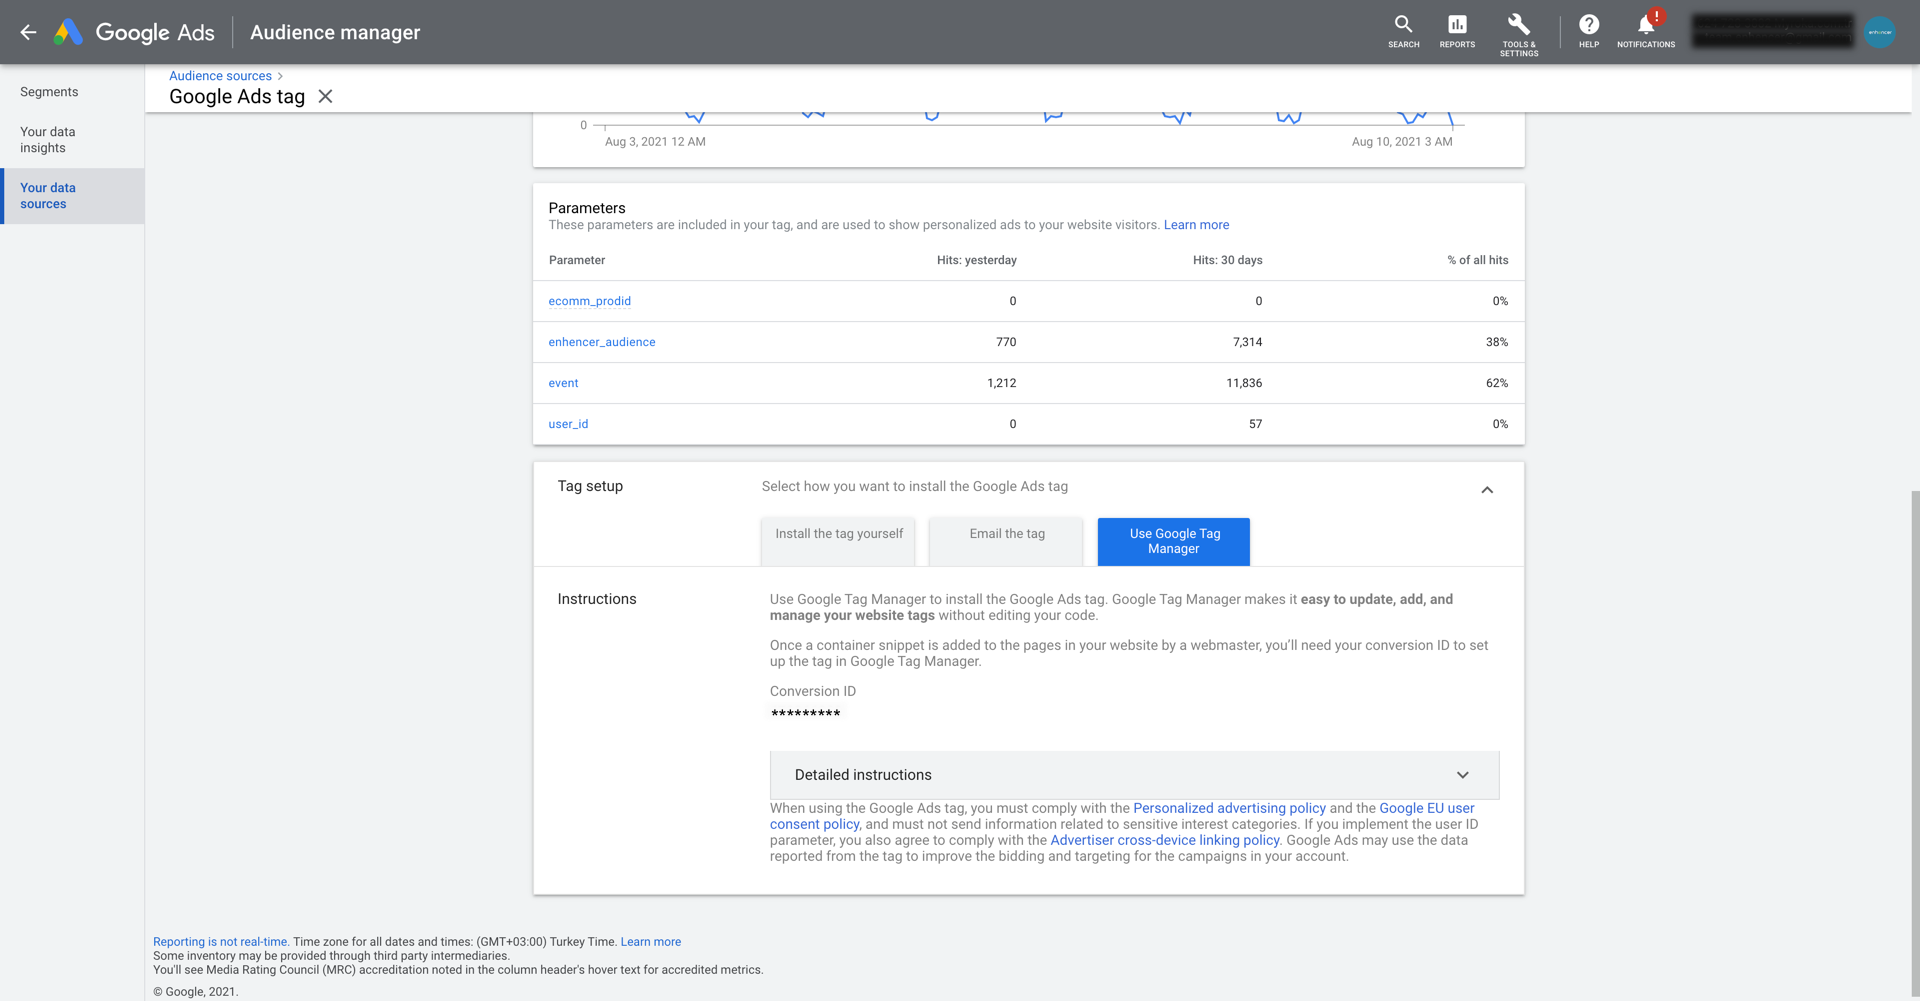
Before creating a tag, you have to get your Conversion ID from your Google
Ads panel. Go to 'Tools & Settings', select 'Audience Manager'. On the
left panel select 'Your data sources', click on 'Details' in the 'Google
Ads tag'. At the very bottom, open 'Tag setup' dropdown and select 'Use
Google Tag Manager'. You can see your Conversion ID there.
Google Ads Remarketing Tag
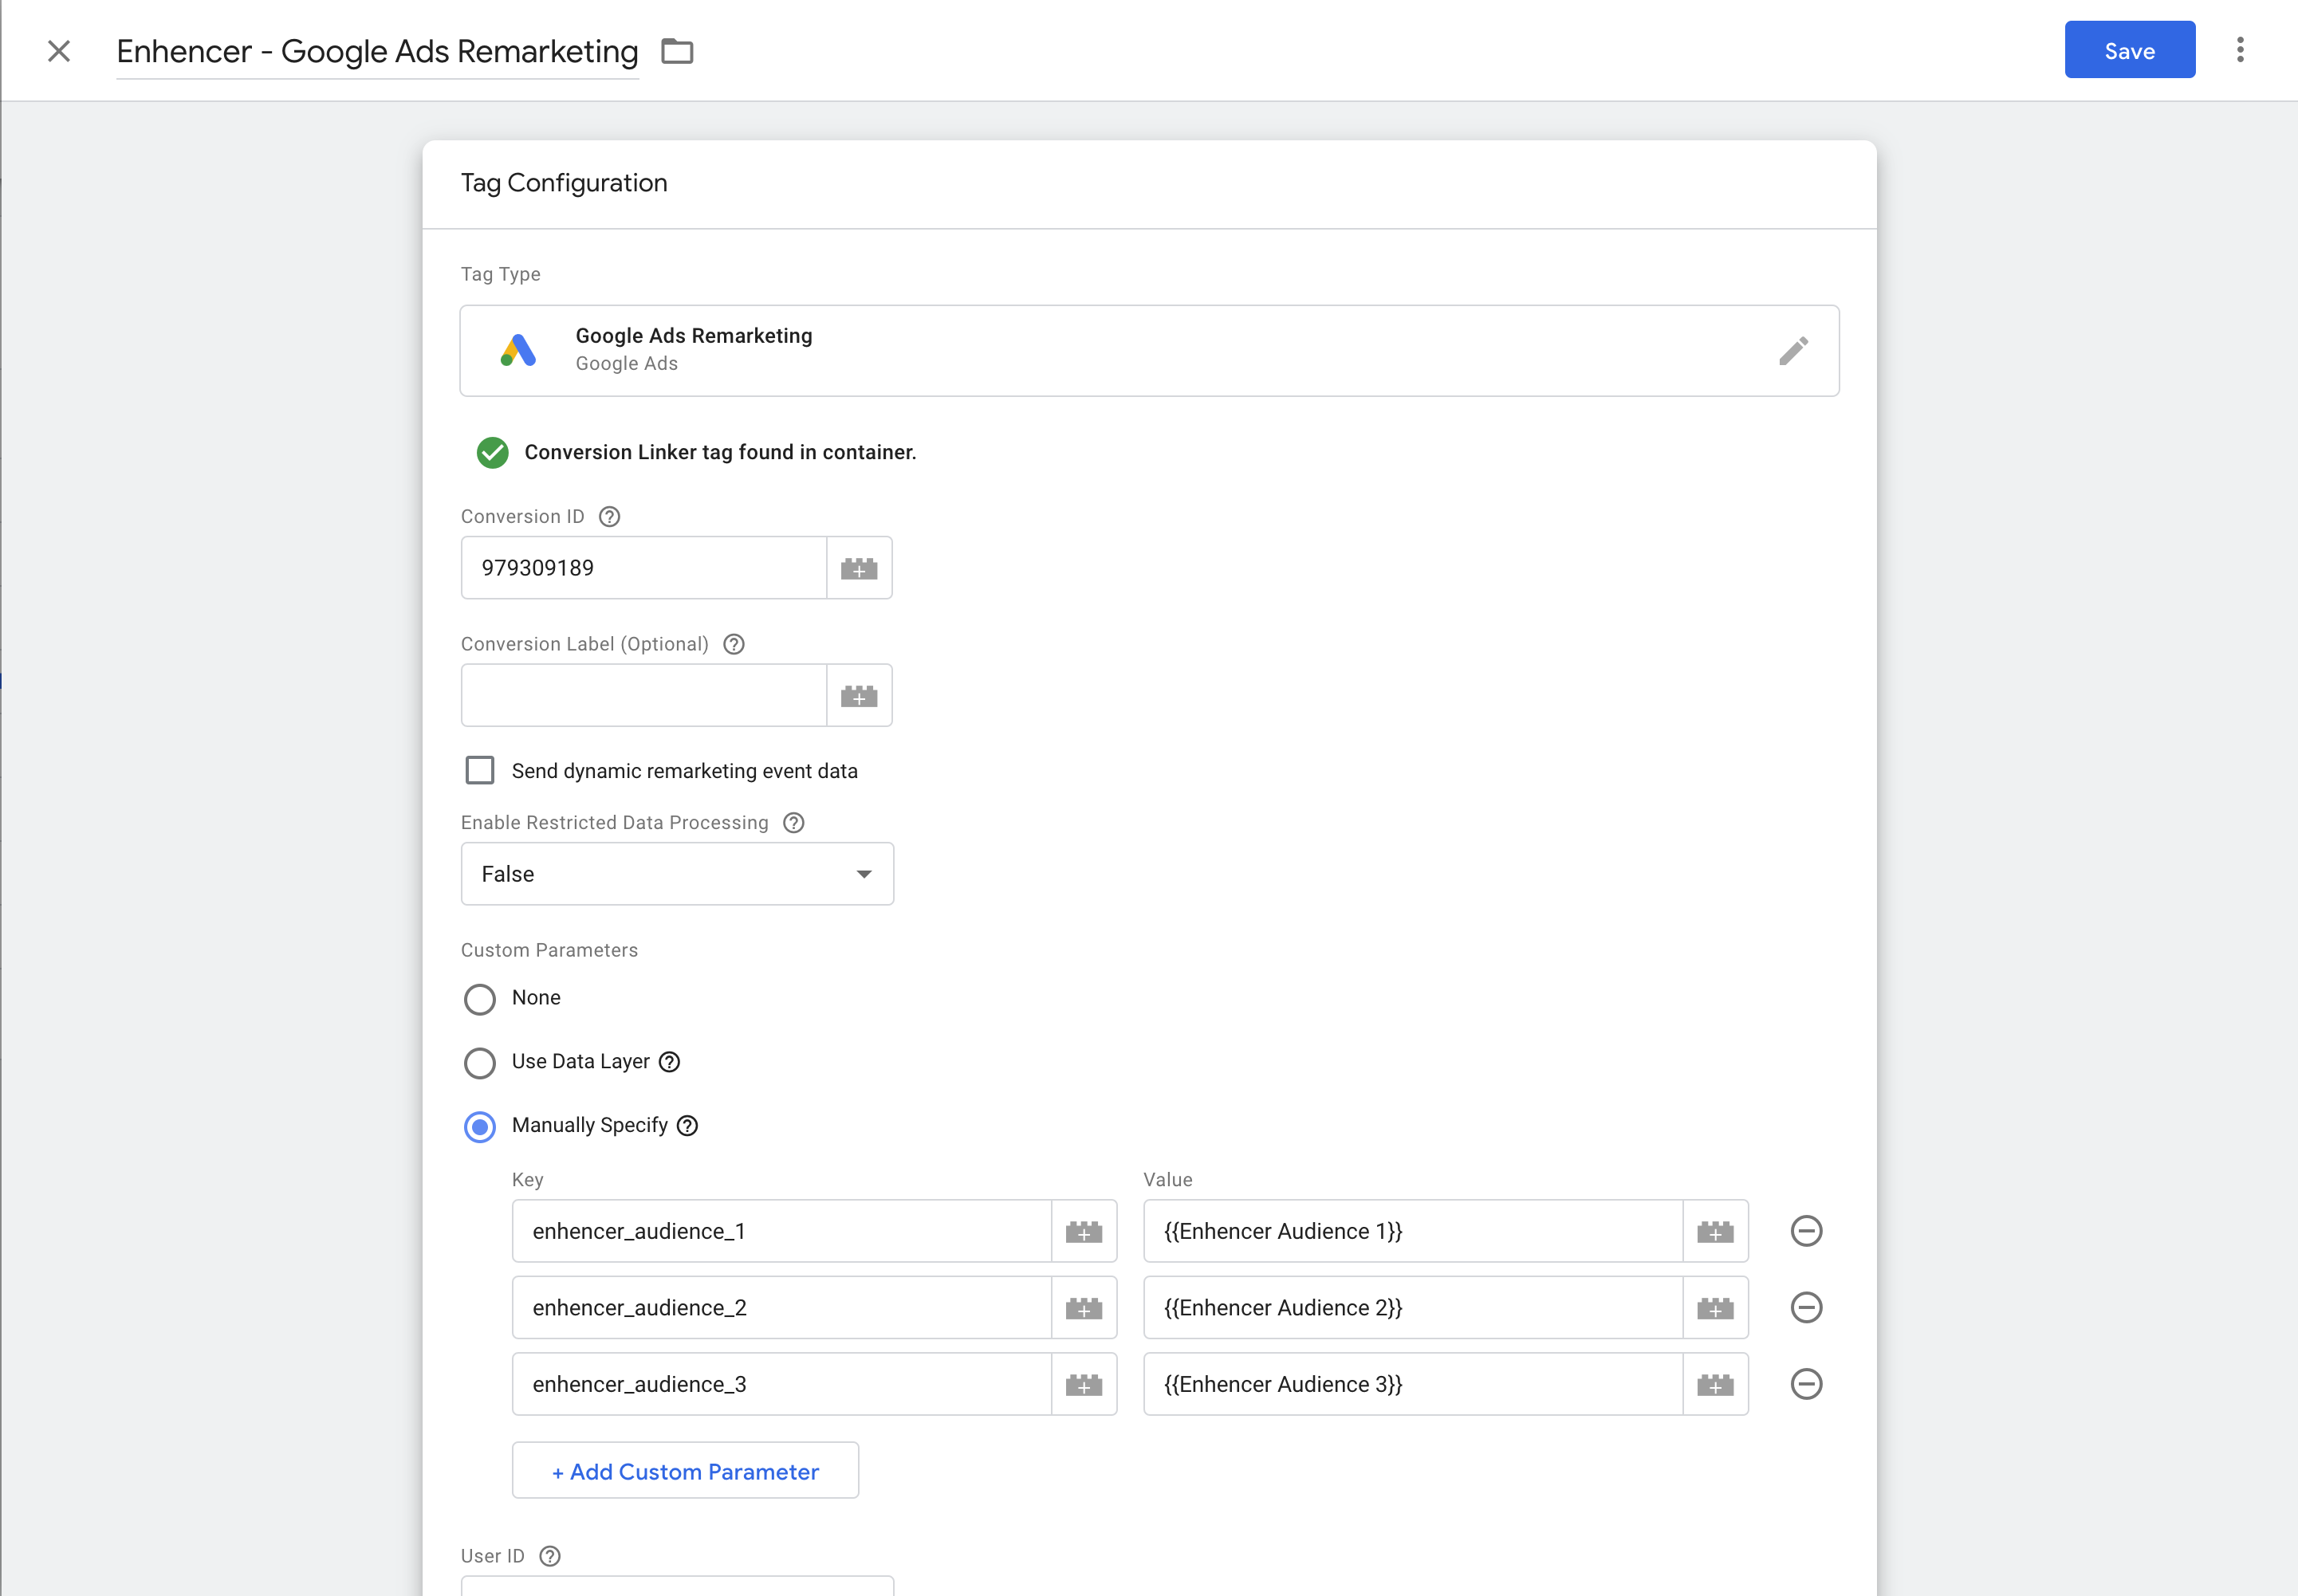
Create a tag called "Enhencer - Google Ads" with 'Google Ads Remarketing'
type. Paste your Conversion ID in the respective field. Save the tag and
ignore the warning.
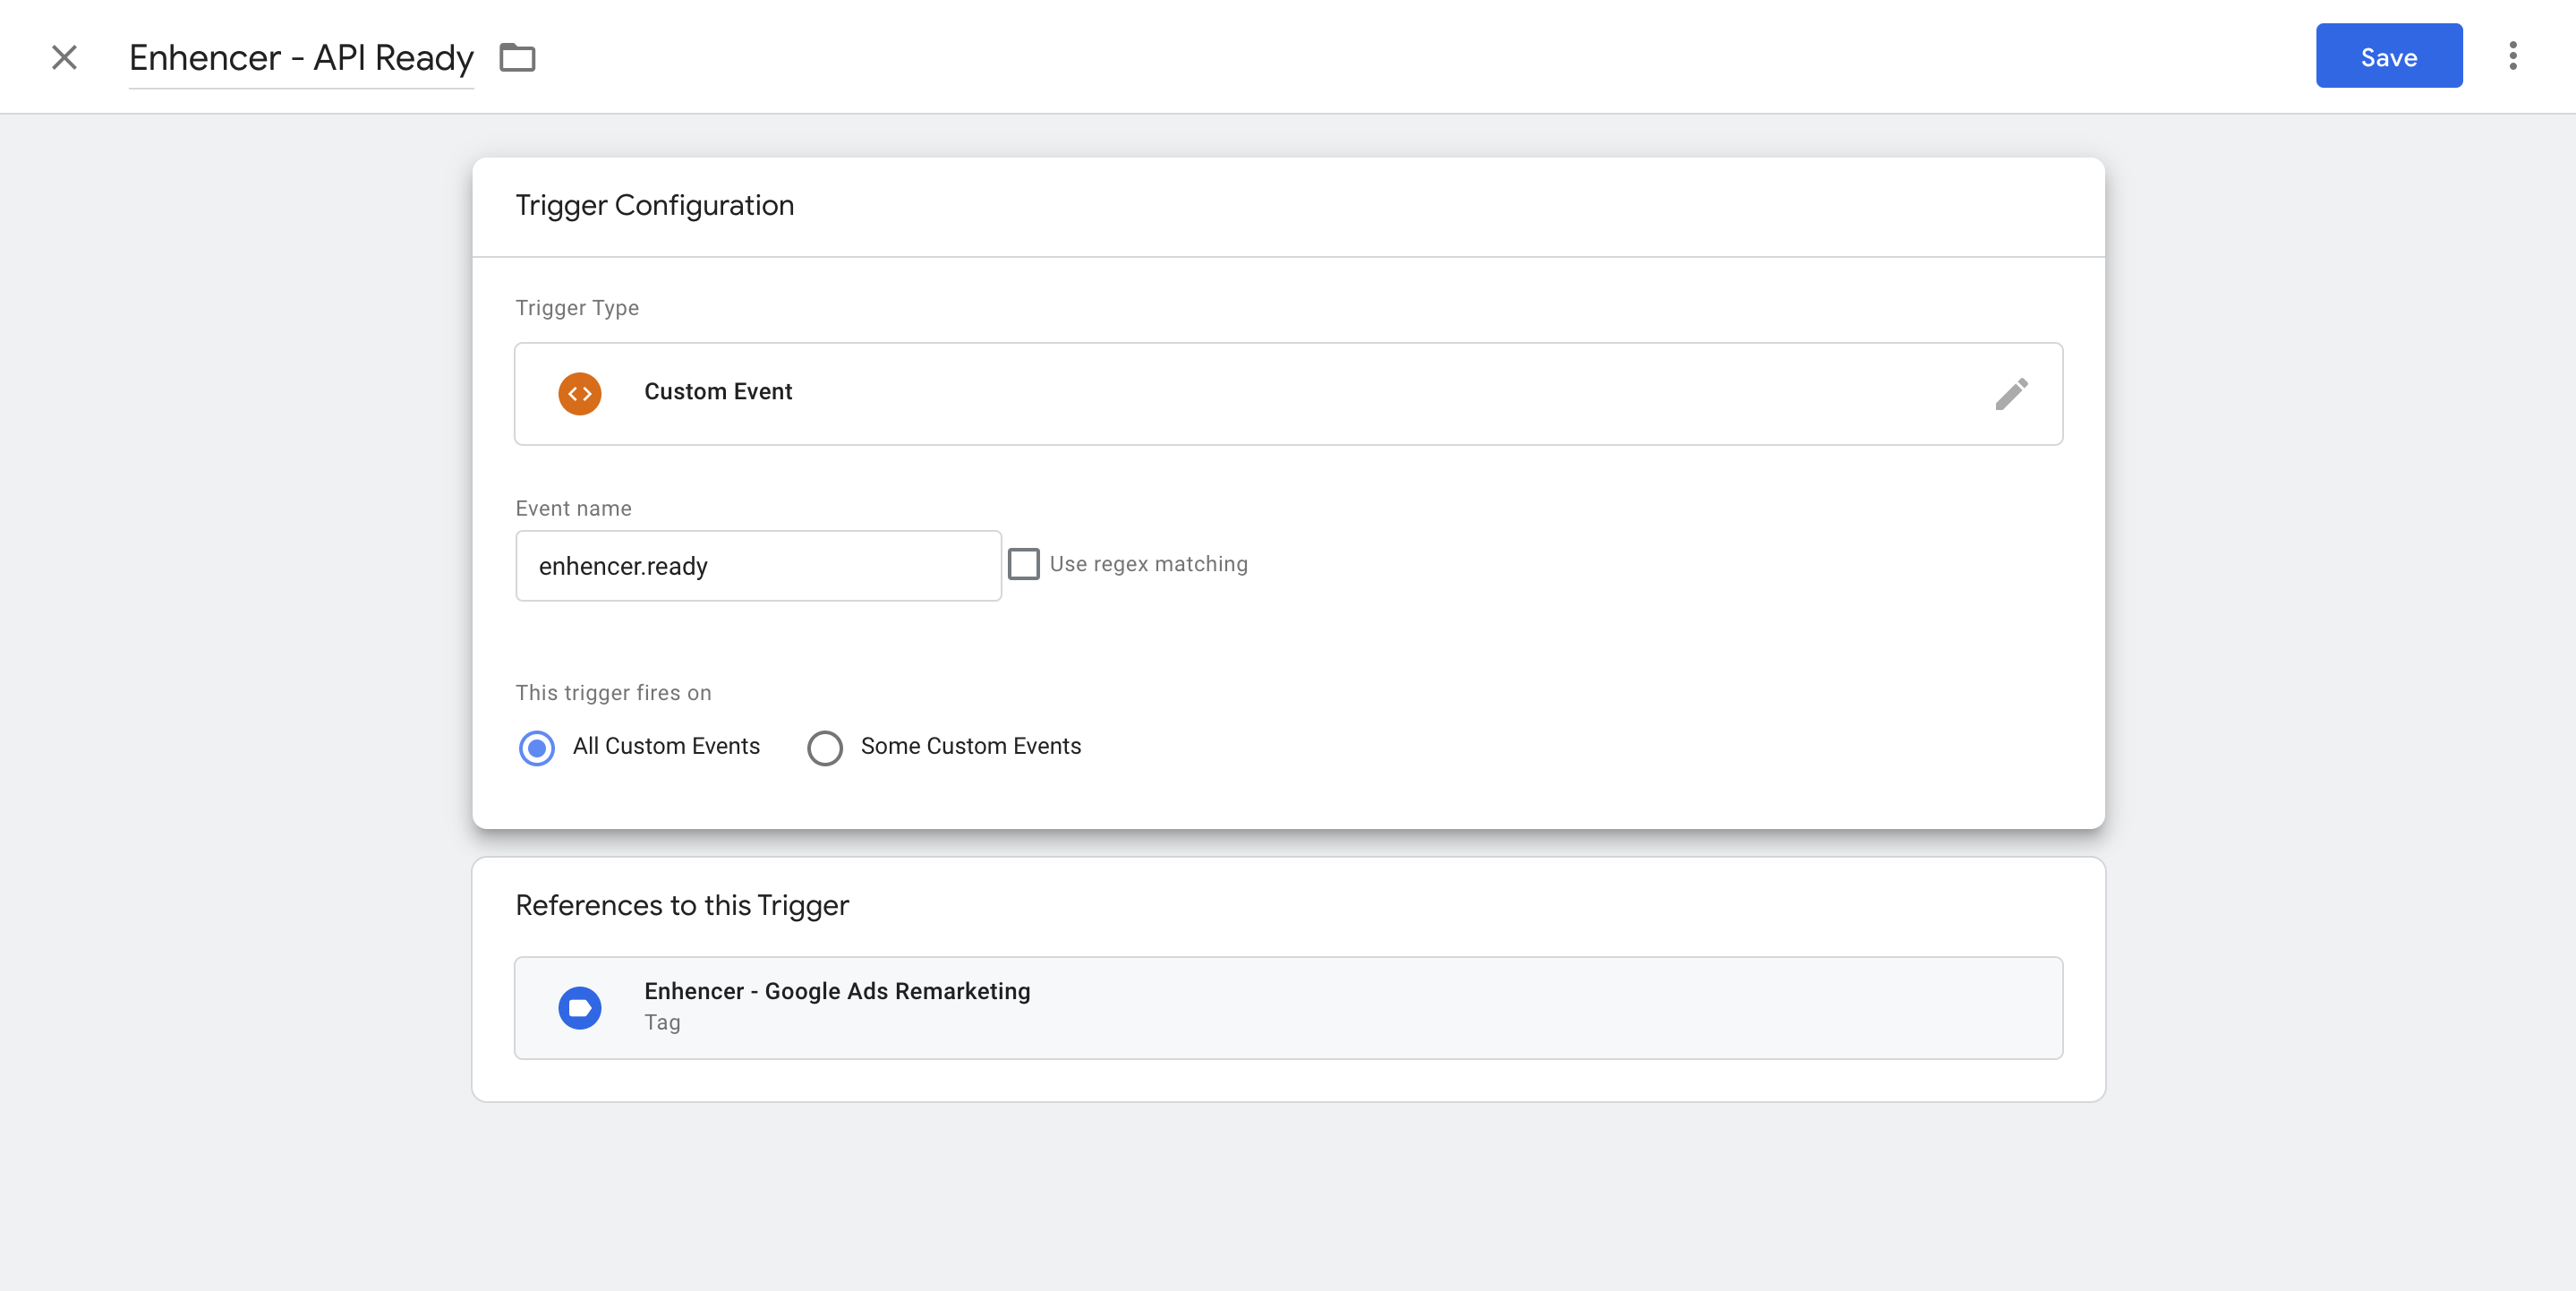
Next, you need a trigger and the variables for the tag. First, create a
trigger called 'Enhencer API Ready' with 'Custom Event' type and enter
'enhencer.ready' in the name field.
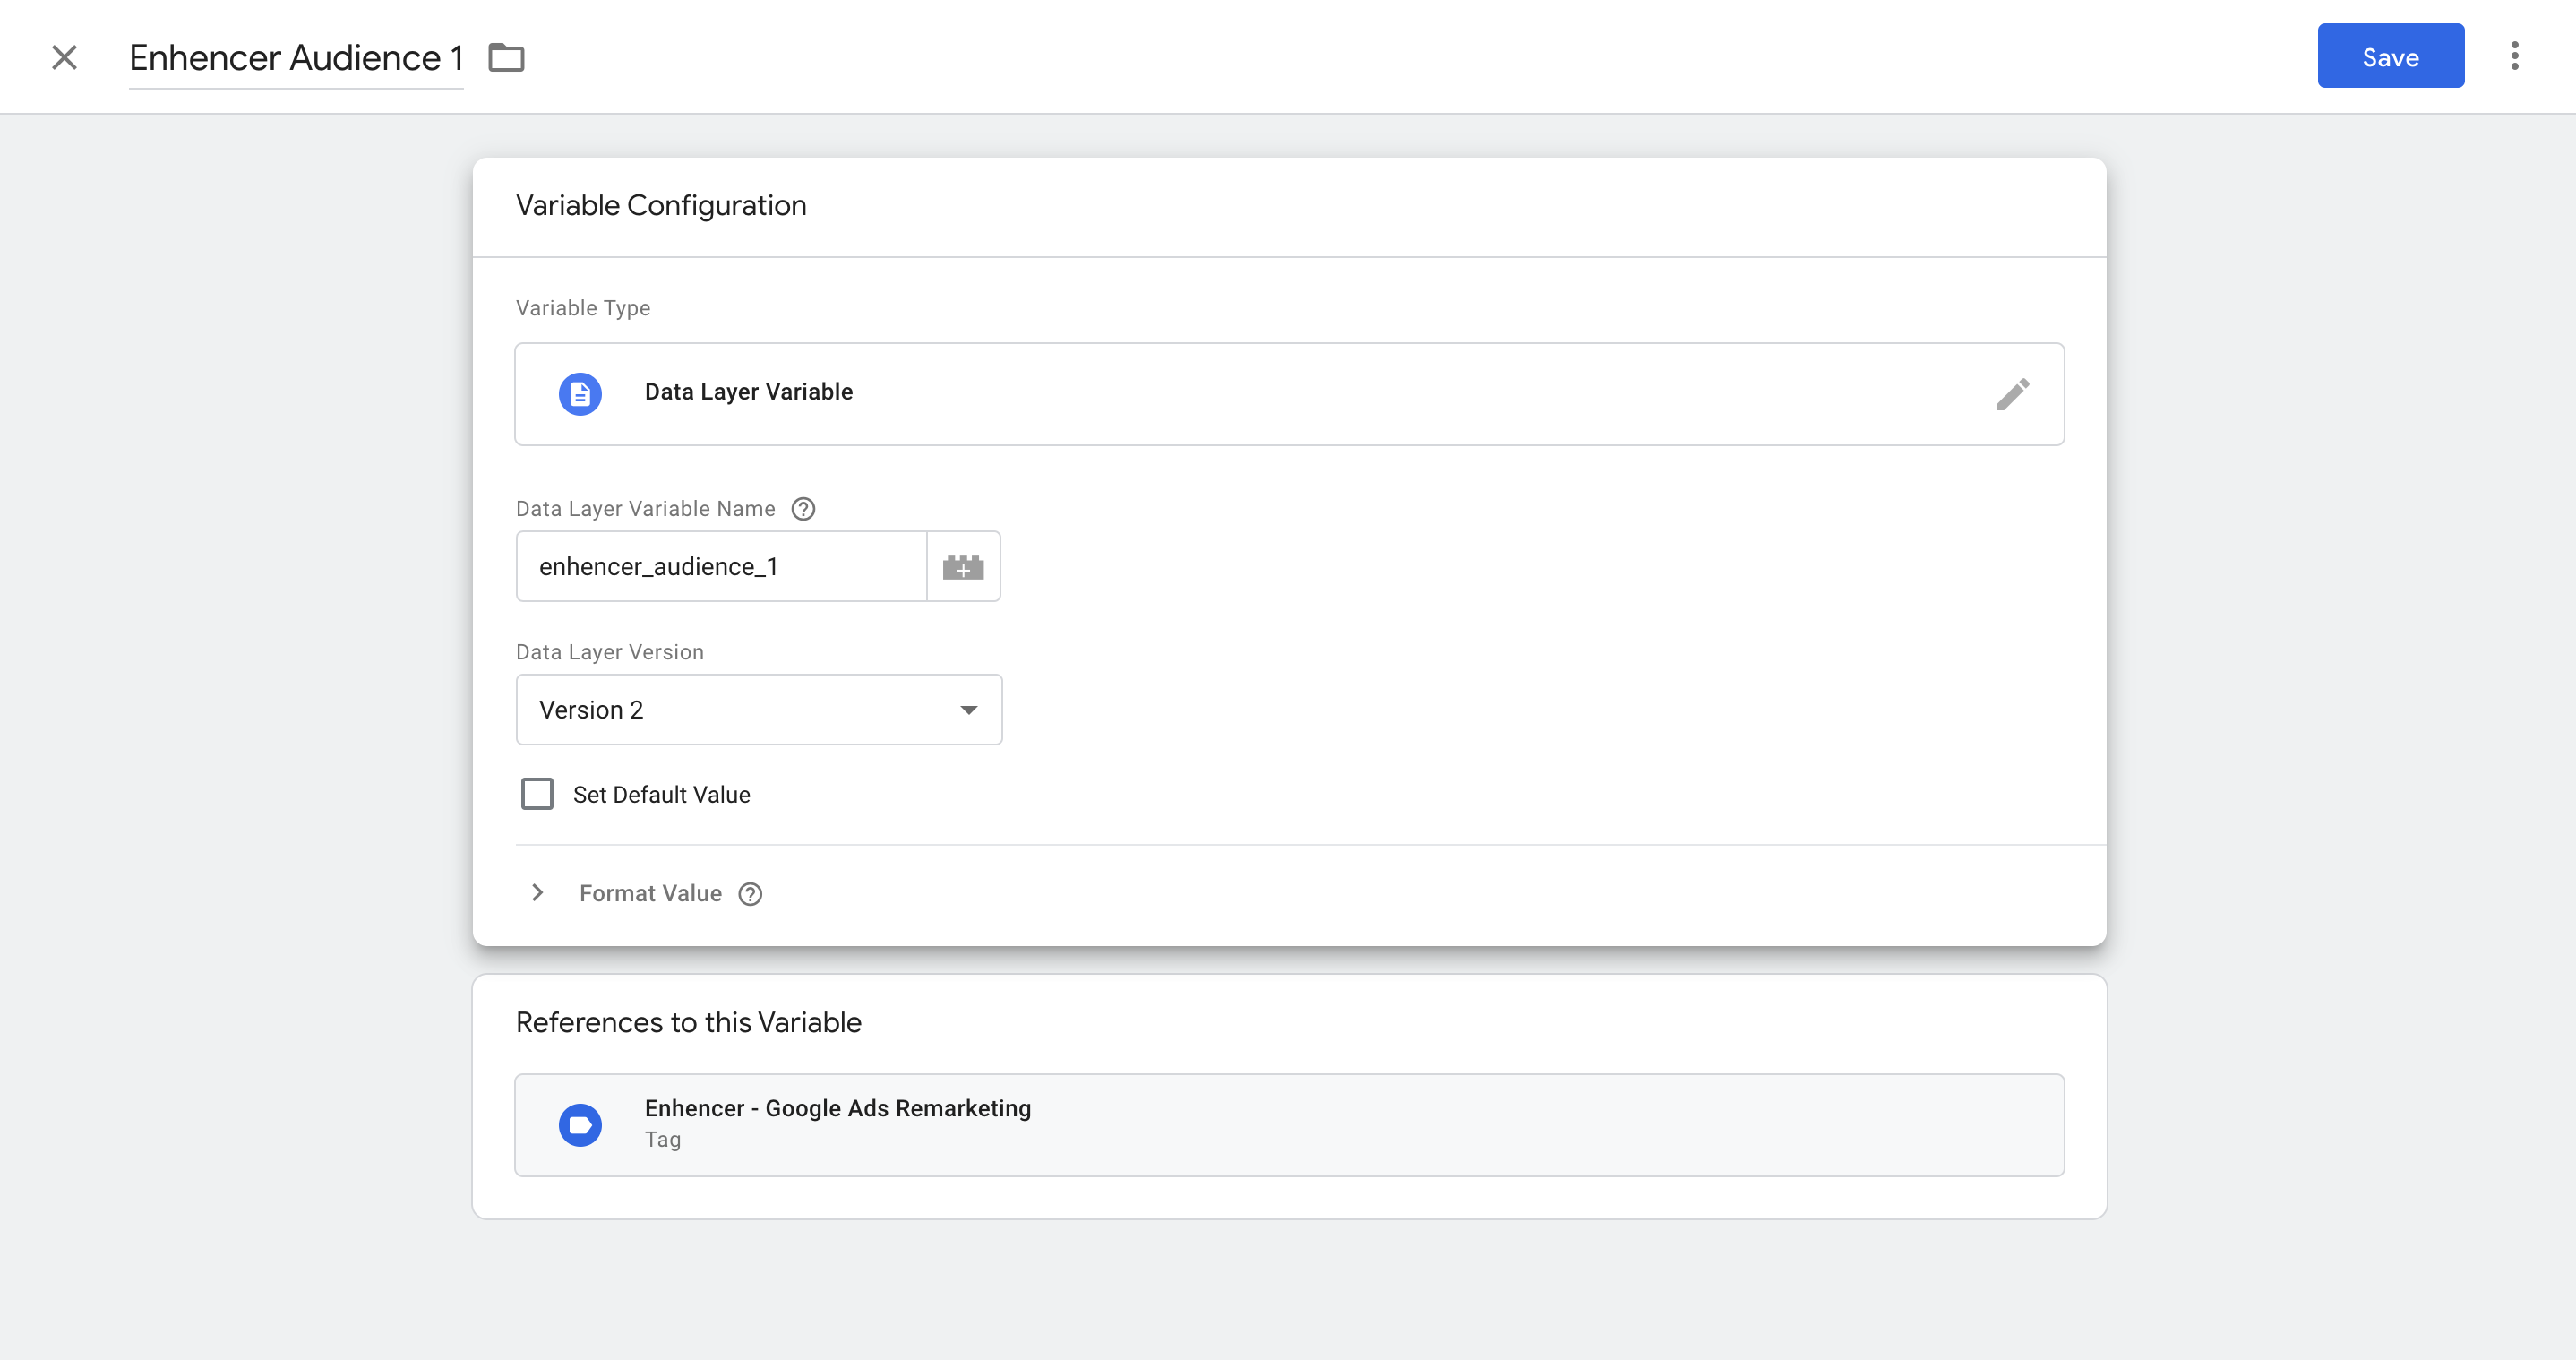
Create variables called 'Enhencer Audience 1', select 'Data Layer
Variable' type and enter 'enhencer_audience_1' in the 'Data Layer Variable
Name' field. Repeat the same procedure for the other Enhencer Audiences
you need, just replace 1 with the audience number (enhencer_audience_2,
enhencer_audience_3 etc).
Now, return to the tag and in the custom parameters section add variables
you have created with with the same names. Select the trigger that you
have just created and save the tag.
This configuration will
send the variables to your Google Ads panel.
Revolutionize your Paid Marketing
Want to grow your business
with AI Ads?
Get the latest E-commerce trends straight to your inbox


